Running on macOS
Modern macOS operating systems are descendents of BSD Unix systems. This means that the operating system shares some architectural similarities with the Linux systems that a great deal of the world’s information infrastructure already runs on.
Terminology Specific to macOS
| ⌘ | The ⌘, or “command key” is a symbol on macOS keyboards used for keyboard combinations. Many keyboard combinations include ⌘ for shortcuts, such as ⌘ + c for copying selected text. |
| Dock | The Dock is the location along the bottom of the screen that includes running applications, files, downloads, and applications that have previously been “pinned” to the Dock. |
| Spotlight or Spotlight Search | Spotlight is a convenient way to launch applications. By default it should be possible to access with the keyboard shortcut: ⌘ + SPACE, followed by typing the first few characters of an applications name. For example: open spotlight and type the first few letters of “terminal.” |
| Terminal | macOS has a built-in terminal emulator called “Terminal.” It should be installed by default, may be launched by typing the name into Spotlight and pressing enter, and we recommend pinning it to the Dock for easy access in the future. |
| xcode or XCode | xcode is a macOS application for software and application development on macOS. We will use xcode indirectly by installing it and using some of the developer tools that it includes by default, particularly git. |
Follow Along with the Instructor
Install xcode developer tools
- Open a Terminal
- Pin the Terminal to your Dock (if it is not already)
- Run the xcode installer by typing (or copying & pasting) this into the Terminal:
xcode-select --install
- Restart your machine
Install Visual Studio Code
Follow the Visual Studio Code (VS Code) macOS recommendations.
- Download VS Code
- Click the downloaded file in the web browser downloads
- Drag
Visual Studio Code.appto your Applications folder - Open VS Code by double clicking the icon
- Right click the VS Code icon and pin it to your Dock.
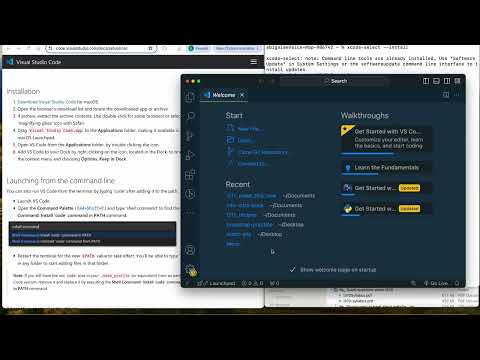
Install VS Code command line tools
- In VS Code, open the command palette with ⌘ + SHIFT + P and type “shell command.”
- Select the option for “Shell Command: Install ‘code’ command in PATH”
- Close VS Code and close the Terminal
Final Check
Check that everything is available in the terminal by running each of the following commands.
If an error message similar to “command not found” appears, double check the installation steps, then ask someone for help if the solution is not obvious.
git --version                   # See "Install xcode developer tools" section
python3 --version
code --version                  # See "VS Code command line tools" section
Troubleshooting
VS Code Permission Errors / Read-only directory
VS Code permission errors are likely caused when VS Code is running out of a read-only directory (e.g. Downloads, Desktop).
- Open VS Code
- Right click and “Show in finder”
- Open another Finder window with your Applications directory
- Drag the icon from the old location to the Applications directory